Microsoft Office Skills: A Key to Success in the Modern Workplace
In today’s digital age, proficiency in Microsoft Office has become an essential skill for success in the modern workplace. Whether you’re a student, a job seeker, or a professional looking to advance your career, having strong Microsoft Office skills can give you a competitive edge and open up a world of opportunities.
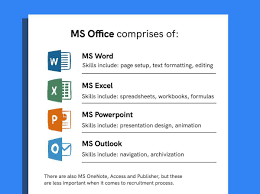
Microsoft Office is a suite of productivity tools that includes popular applications like Word, Excel, PowerPoint, Outlook, and more. These applications are widely used across industries for tasks such as creating documents, analyzing data, delivering presentations, managing emails and calendars, and collaborating with colleagues.
One of the key benefits of mastering Microsoft Office is increased efficiency. With advanced knowledge of these tools, you can streamline your work processes and complete tasks more quickly and accurately. For example, knowing how to use advanced features in Word can help you create professional-looking documents with ease. Being proficient in Excel allows you to analyze complex data sets efficiently and make informed business decisions. And having strong PowerPoint skills enables you to create visually appealing presentations that captivate your audience.
Moreover, Microsoft Office skills are highly transferable. Regardless of your field or industry, chances are that at some point in your career you will need to interact with these applications. Employers value candidates who possess solid Microsoft Office skills as it demonstrates their ability to adapt to different work environments and handle various tasks effectively.
Acquiring Microsoft Office skills is not as daunting as it may seem. There are numerous resources available online such as tutorials, videos, and online courses that can help you learn at your own pace. Additionally, many educational institutions offer training programs specifically designed to enhance Microsoft Office proficiency.
Investing time in improving your Microsoft Office skills can have far-reaching benefits for your personal growth and career advancement. Here are some reasons why:
- Enhanced productivity: By leveraging the full potential of Microsoft Office applications, you can complete tasks faster and more efficiently, allowing you to accomplish more in less time.
- Improved communication: Microsoft Office tools enable effective communication through professional emails, well-structured documents, and visually appealing presentations.
- Increased employability: Employers often prioritize candidates with strong Microsoft Office skills, as it demonstrates their ability to adapt to the demands of a modern workplace.
- Career advancement: Proficiency in Microsoft Office can open doors to new opportunities and help you stand out among your peers when seeking promotions or new job prospects.
- Streamlined collaboration: Microsoft Office provides various collaboration features that allow multiple users to work on the same document simultaneously, making teamwork more efficient and seamless.
In conclusion, mastering Microsoft Office skills is a valuable asset in today’s professional landscape. Whether you’re a student preparing for future academic pursuits or a professional aiming for career growth, investing time in improving your proficiency with these tools can significantly enhance your productivity, communication abilities, and employability. So why wait? Start learning today and unlock the full potential of Microsoft Office!
Frequently Asked Questions: Microsoft Office Skills in English (UK)
- How do I create a document in Microsoft Office?
- How do I format text in Microsoft Office?
- How do I add images to a document in Microsoft Office?
- How do I insert tables and charts into a document in Microsoft Office?
- What are the keyboard shortcuts for Microsoft Office?
- How can I collaborate with others on documents using Microsoft Office tools?
How do I create a document in Microsoft Office?
Creating a document in Microsoft Office is a straightforward process. Here’s a step-by-step guide to help you get started:
- Open the Microsoft Office application of your choice (e.g., Microsoft Word for creating text documents).
- Once the application is open, you’ll typically see a blank document ready for you to start working on. If not, go to the “File” tab at the top left corner of the screen and select “New” or “Blank Document.”
- Begin by typing your content directly into the document. You can start with a title or any other information you want to include.
- Use the various formatting options available in the application’s toolbar to customize your document. For example, you can change font styles, adjust font size, apply bold or italic formatting, align text, and more.
- Insert images, tables, charts, or other elements into your document if needed. Look for specific options like “Insert” or related icons in the toolbar.
- Save your document regularly as you work by clicking on the “Save” icon located at the top left corner of the screen or by pressing Ctrl + S (Windows) or Command + S (Mac). Choose a name and location for your file and click “Save.”
- To further organize your document, consider using headings and subheadings to create an outline structure. This can be done by selecting text and applying appropriate heading styles from the formatting options.
- Proofread and edit your document for any errors or improvements before finalizing it. You can use spelling and grammar checkers available within the application to assist you.
- Once you’re satisfied with your document, save it one last time and consider exporting it to a suitable format (e.g., PDF) if necessary.
- Finally, close the application when you’re done working on your document.
Remember that these steps are general guidelines applicable to most Microsoft Office applications. Different applications may have additional features and options specific to their purpose.
How do I format text in Microsoft Office?
Formatting text in Microsoft Office is a fundamental skill that allows you to enhance the appearance and readability of your documents. Here are some basic formatting techniques for text in Microsoft Office applications like Word, Excel, and PowerPoint:
- Font Styles: You can change the font style, size, and color of your text to make it stand out. Select the text you want to format and use the font options in the toolbar or ribbon at the top of the application window. Experiment with different fonts to find one that suits your document’s tone and purpose.
- Bold, Italicize, and Underline: Emphasize specific words or phrases by applying bold (Ctrl+B), italic (Ctrl+I), or underline (Ctrl+U) formatting. You can also use these options together for added emphasis.
- Alignment: Adjusting the alignment of your text can improve readability and visual appeal. Align your text left, right, center, or justify (evenly spaced on both sides) using the alignment buttons in the toolbar or ribbon.
- Bullets and Numbering: Use bullet points or numbering to organize information in lists. Select the list items and click on the bullet point or numbering buttons in the toolbar or ribbon.
- Headings and Subheadings: In longer documents, use headings and subheadings to structure your content effectively. Apply heading styles from the “Styles” section in Word’s toolbar or ribbon to create consistent formatting throughout your document.
- Text Effects: Microsoft Office provides various text effects that can add visual interest to your document. Explore options like shadowing, embossing, highlighting, and more by selecting your text and accessing the “Text Effects” menu in Word’s toolbar or ribbon.
- Line Spacing: Adjusting line spacing can improve readability by creating more breathing space between lines of text. Use options like single spacing, 1.5 spacing, or double spacing in the toolbar or ribbon.
- Text Boxes: In PowerPoint and Word, you can use text boxes to add text in a specific location on your slide or page. Insert a text box from the “Insert” menu and customize its appearance using the formatting options available.
Remember to save your document regularly as you format to avoid losing any changes. It’s also helpful to experiment with different formatting options and preview your document before finalizing it.
These are just some of the basic formatting techniques available in Microsoft Office applications. As you become more comfortable, you can explore advanced features like styles, tables, borders, and shading to further enhance your documents.
How do I add images to a document in Microsoft Office?
Adding images to a document in Microsoft Office is a straightforward process. Here’s how you can do it in different applications within the suite:
Microsoft Word:
– Place your cursor in the document where you want to insert the image.
– Go to the “Insert” tab on the ribbon.
– Click on the “Pictures” option and navigate to the location where your image is saved.
– Select the image file and click “Insert.”
Microsoft Excel:
– Select the cell where you want to insert the image.
– Go to the “Insert” tab on the ribbon.
– Click on the “Pictures” option and browse for your desired image file.
– Select the image file and click “Insert.”
Microsoft PowerPoint:
– Navigate to the slide where you want to add an image.
– Go to the “Insert” tab on the ribbon.
– Click on the “Pictures” option and locate your desired image file.
– Select the image file and click “Insert.”
In all three applications, once you’ve inserted an image, you can resize, move, or format it according to your requirements. Simply click on the inserted image, and handles will appear around it that allow you to adjust its size or position.
Remember that it’s important to use high-quality images that are relevant to your document’s content. Large images may increase file size, so consider optimizing them if necessary.
Additionally, Microsoft Office provides additional features for working with images, such as cropping, applying artistic effects, adding captions, or adjusting brightness and contrast. These options can be found in various tabs depending on which application you’re using.
By following these steps and exploring further options available in each application’s respective menus or ribbons, you’ll be able to add images seamlessly into your Microsoft Office documents.
How do I insert tables and charts into a document in Microsoft Office?
Inserting tables and charts into a document in Microsoft Office is a straightforward process. Here’s how you can do it:
Microsoft Word:
– To insert a table, click on the “Insert” tab in the toolbar.
– In the “Tables” group, click on the “Table” button and select the number of rows and columns you want for your table. Alternatively, you can choose “Insert Table…” to specify the exact dimensions.
– A table will be inserted into your document, and you can start entering data into it.
– To insert a chart, place your cursor where you want to insert the chart.
– Click on the “Insert” tab in the toolbar.
– In the “Illustrations” group, click on the “Chart” button.
– Choose the desired chart type from the options available (such as column, line, pie, etc.).
– A new Excel worksheet will open with sample data. Replace this data with your own or copy and paste it from another source.
– Close the Excel window when you’re done editing, and your chart will be inserted into your Word document.
Microsoft Excel:
– To insert a table, select a range of cells that you want to convert into a table.
– Click on the “Insert” tab in the toolbar.
– In the “Tables” group, click on the “Table” button or use the keyboard shortcut Ctrl+T.
– Confirm that Excel has correctly identified your data range and choose any additional options if needed.
– Click “OK,” and your selected range will be converted into a table.
– To insert a chart, select the data range you want to visualize in a chart.
– Click on the “Insert” tab in the toolbar.
– In the “Charts” group, choose from various chart types such as column, line, pie, etc.
– Select the desired chart type, and it will be inserted into your Excel worksheet.
Microsoft PowerPoint:
– To insert a table, click on the “Insert” tab in the toolbar.
– In the “Tables” group, click on the “Table” button and select the number of rows and columns you want for your table. Alternatively, you can choose “Insert Table…” to specify the exact dimensions.
– A table will be inserted into your slide, and you can start entering data into it.
– To insert a chart, place your cursor where you want to insert the chart.
– Click on the “Insert” tab in the toolbar.
– In the “Illustrations” group, click on the “Chart” button.
– Choose the desired chart type from the options available (such as column, line, pie, etc.).
– A new Excel worksheet will open with sample data. Replace this data with your own or copy and paste it from another source.
– Close the Excel window when you’re done editing, and your chart will be inserted into your PowerPoint slide.
Remember to customize tables and charts according to your specific needs by adjusting formatting options such as font styles, colors, and layouts.
What are the keyboard shortcuts for Microsoft Office?
Keyboard shortcuts can greatly enhance your productivity when using Microsoft Office applications. Here are some commonly used keyboard shortcuts for the popular applications in the Microsoft Office suite:
Microsoft Word:
– Ctrl + N: Create a new document
– Ctrl + O: Open an existing document
– Ctrl + S: Save the current document
– Ctrl + C: Copy selected text or objects
– Ctrl + X: Cut selected text or objects
– Ctrl + V: Paste copied or cut text or objects
– Ctrl + B: Bold formatting
– Ctrl + I: Italic formatting
– Ctrl + U: Underline formatting
– Ctrl + P: Print the document
Microsoft Excel:
– Ctrl + N: Create a new workbook
– Ctrl + O: Open an existing workbook
– Ctrl + S: Save the current workbook
– Ctrl + C: Copy selected cells or objects
– Ctrl + X: Cut selected cells or objects
– Ctrl + V: Paste copied or cut cells or objects
– F2: Edit the active cell’s contents
– F4: Repeat the last action performed
Microsoft PowerPoint:
– Ctrl + N: Create a new presentation
– Ctrl + O: Open an existing presentation
– F5 : Start a slideshow from the beginning
– F7 : Spellcheck
These are just a few examples of keyboard shortcuts available in Microsoft Office applications. Each application has its own set of unique shortcuts. To explore more shortcuts and customize them to your preference, you can refer to the official Microsoft Office support website for detailed information on keyboard shortcuts specific to each application.
Remember, using keyboard shortcuts can significantly speed up your work and improve efficiency, so it’s worth investing time in learning and incorporating them into your workflow.
How can I collaborate with others on documents using Microsoft Office tools?
Collaborating with others on documents using Microsoft Office tools is a powerful feature that enhances teamwork and productivity. Here are some methods you can use to collaborate effectively:
- **Microsoft Word:** In Word, you can collaborate on documents by utilizing the “Track Changes” feature. This allows multiple users to make edits and suggestions that are visible to everyone. You can also add comments to specific sections of the document for discussions and feedback.
- **Microsoft Excel:** Excel offers collaboration features such as shared workbooks and co-authoring. By saving your Excel file on a cloud storage platform like OneDrive or SharePoint, you can invite others to access and edit the workbook simultaneously. This enables real-time collaboration, making it easier to work together on data analysis, budgeting, or any other spreadsheet-related tasks.
- **Microsoft PowerPoint:** PowerPoint allows for collaboration through its co-authoring feature. By saving your presentation on a cloud storage platform, multiple users can work on different slides simultaneously. This promotes seamless teamwork during the creation or editing of presentations.
- **Microsoft OneNote:** OneNote is designed specifically for collaborative note-taking and information sharing. You can create notebooks and share them with colleagues, allowing everyone to contribute ideas, add notes, attach files, or even record audio/video clips.
- **Microsoft Outlook:** Outlook offers collaboration features for email communication and scheduling meetings. You can share calendars with colleagues to coordinate schedules efficiently, schedule meetings where attendees can propose new meeting times, and assign tasks within emails for better task management.
To collaborate effectively using these tools:
– Save your documents in a shared location such as OneDrive or SharePoint.
– Use the “Share” feature within each application to invite collaborators via email.
– Set permissions to control whether others can only view the document or have editing rights.
– Communicate with your collaborators through comments or chat features provided within each application.
– Regularly save your changes while collaborating to ensure everyone’s progress is up to date.
– Be mindful of version control and avoid overwriting each other’s work. If conflicts arise, use the “Track Changes” feature or discuss and resolve them among the collaborators.
By utilizing these collaboration features in Microsoft Office tools, you can enhance teamwork, streamline communication, and create more efficient workflows when working on documents with others.
Leave a Reply